Categories
Uncategorized

How to overseed your lawn

Tips on how to overseed your lawn


Overseeding of an existing lawn is an essential part of annual lawn maintenance. All lawns are affected by the specific growing conditions in different environments in which they exist, their level of use and general weather conditions. As a result, understanding all the basic principles of overseeding and your choice of seed mix will enable you to work with nature toward a greener, healthier and brighter lawn.

Overseeding your lawn will:

  • Help infill damaged, bare patches or thin, worn areas and give your lawn a thicker, denser sward.
  • Improve the colour of the lawn.
  • Reduce weed and moss invasion.

When is the best time to overseed a lawn

The best time to overseed an existing lawn is in spring or autumn, with germination taking 7 to 21 days in ideal conditions.

The Typical daily temperatures need to be in excess of 13ºC for grass seed germination to be successful.

Choosing the right lawn seed

It’s important to choose the right seed for overseeding. First of all, try to work out what grass types you already have in your lawn. You will also need to consider what you use the lawn for heavy traffic (kids), dogs running around, the aspect of the garden, if the soil drains well, as well as the appearance you are trying to achieve.

For a more wear tolerant lawn choose a seed mix containing perennial ryegrass, a blend of some of the most advanced cultivars for excellent appearance and durability, ideal for use in the majority of gardens and perfect for overseeding. It contains both fine and medium-bladed leaf, with outstanding year round colour, that will establish rapidly.

For shady, drier areas or ornamental lawns a pure fescue blend may be more appropriate and will introduce shade and drought tolerant grasses, which have a fine bladed leaf and rich green colour. This type of seed mix is also ideal if you are looking to introduce finer grasses to a ryegrass, utility lawn.

You may also want to select a different seed mix for different areas of your garden or even different areas of the same lawn. For example, a fescue blend for a front lawn and a ryegrass blend for a back garden and a shady part of your lawn will benefit from a higher proportion of fescues in the mix.

How to overseed your lawn

  • Mow the lawn to approx 25mm.
  • Use a spring tine rake to break up and remove the layer of dead matted grass known as thatch. Dependent on the depth of thatch on a lawn this process may require a powered scarifier, which can be hired from most hire shops. This will help the seed make contact with the soil allowing it to germinate.
  • Using a garden fork, spike the lawn to a depth of approx. 150mm at 300mm intervals.
  • If your lawn has not been fed in the last 4 months we recommend feeding the lawn before overseeding. The lawn can usually be overseeded 3 to 4 days after applying a general lawn fertiliser, however, you will usually need to wait about 4 weeks after applying a feed, weed & moss killer. (Check the instructions on the product for this.) Pre-seeding fertiliser is ideal and can be applied up to a few days before overseeding.
  • Sow the seed evenly across the lawn.
  • Lawn Seed should be applied at a rate of 23g per m².
  • The seed can be mixed with Lawn topdressing and applied to the lawn jointly. This will save a bit of time and effort working the topdressing and seed into the surface the existing lawn.
  • The seeded area must be kept moist, therefore, water your lawn after 2 or 3 days if no rain has fallen.
  • Specific bare patches can be reseeded without treating the whole lawn. Apply the same procedure as above, but use sowing rates as for a new lawn 35g per m².
  • To protect specific areas from birds consider covering with netting or garden fleece. This should be removed when new shoots start to come through the soil.
  • Try to keep traffic on a freshly overseeded lawn to a minimum for 7 to 21 days.
  • Raise mowing heights to approximately 50mm for the initial 2 or 3 cuts, then reduce down to 25mm over the next 2 or 3 cuts. Never remove more than a third of the grass blade length at any one time and on new sowings ideally never more than a quarter.
Categories
Fence Panels

The Best Type of Fence For Your Garden

Your garden fence damaged or want to replace? With so many types of fence panels to choose from, you may want to try something different or a panel of higher quality. How do you make the decision on what’s best for your garden? Let us help you decide….The first thing to remember is that it’s not just about looks; consider your fence’s function, too. To know which style of fence panel is right for you, start by asking yourself a few simple questions:

  • What is the main purpose of the fence?
  • Does it need to provide privacy?
  • Keep pets from straying?
  • Provide a windbreak and shelter for plants?
  • How much maintenance are you willing to do? Some types of fences and materials are likely to last longer than others.
  • What’s your budget?

Let’s look into the different types of fence panels….

Close Board/Feather Board

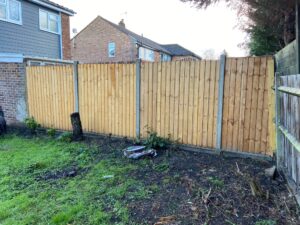
Close-board fences, also called featherboard, are strong and solid, constructed with overlapping vertical feather-edge wooden boards. This type of fencing is commonly used in back gardens – it’s a medium budget option, neat and attractive, offering good privacy and providing some shelter from wind and frost to delicate shrubs. Close Board Fencing is typically 6ft (1.8m) tall, but it’s available in various heights. Keep in mind, however, that many local authorities have height restrictions on boundary fencing so please check with your local authority.

Pros

  • Ideal for most gardens
  • Robust and long-lasting
  • Its height (usually 6ft) provides some security
  • Provides privacy
  • Deters intruders
  • Good for pet-owners
  • Offers shade and shelter for tender plants and shrubs

Cons

  • Can be expensive for a large garden
  • Its closed-up boards can be buffeted by strong winds, though it’s stronger than a larch lap fence panel
  • Maintenance required

Larch-Lap Panel Fencing

Image horizontal panels *********
Larch-lap panel fencing is your typical type of budget fencing made of horizontal slats. Like close-board fencing, you can use timber or concrete post with gravel boards, with the same advantages and disadvantages to these as explained above. Although offering good value, larch-lap panel fencing is not as robust as close-board fencing, being more prone to damage in high winds.

Pros

  • Suitable for most gardens
  • Cheaper than close-board fencing
  • Provides privacy
  • Deters intruders
  • Ideal for homes with pets

Cons

  • Not as robust or long-lasting as close board fencing
  • Maintenance required to prolong the life of the timber
  • Functional, but less attractive than other styles

Timber Palisade/Picket Fencing

If you want a look that’s traditional and decorative, you might consider timber palisade fencing, most notably known as picket fencing. Picket fences are mostly seen in front gardens, where they give a home traditional kerb appeal, but if you’re a sociable type that likes to chat over the fence with neighbours, a picket fence in the rear garden would look lovely, too.Although wood is the conventional material, picket fencing can also be made from PVC for a lower maintenance option. There are a few disadvantages to using PVC however: temperature change can make it brittle, prone to mould and it can be more expensive than wood.This style of fencing is traditionally quite low. With its spacing between the timbers, it’s less prone to wind damage, but it doesn’t offer much protection to tender plants, either.

Pros

  • A good option for front gardens
  • Ideal to protect ponds or swimming pools
  • Provides a good boundary marker
  • Traditional, attractive looks
  • Lets light through / doesn’t block your view
  • Less prone to wind damage

Cons

  • Doesn’t provide privacy
  • Doesn’t provide much security
  • Would not contain some dogs
  • Some maintenance required to protect timber
  • Won’t provide much protection for plants

Slatted Fence Panels


Slatted Fence Panels give a more sleek, more contemporary look to your outside space, very ideal if privacy is not an issue for you. They can make great dividers for different sections of your garden. The effect of sunlight slanting through the gaps is particularly attractive.

Pros

  • Available in a range of heights and styles
  • Sleek, modern appearance
  • Horizontal slats can make your garden appear longer
  • Gaps between slats allow wind through, reducing resistance and improving longevity

Cons

  • Don’t offer complete privacy on a boundary
  • Can let weeds grow through
  • Can be more costly

Additional considerations for your garden fence

Which Fence Posts

If you’ve got some idea now which type of fence panel wold suit your garden, there’s one more major consideration – what type of fence post is best?There are three main options:

  • Timber
  • Concrete
  • Galvanised steel (Durapost)

Timber posts are a cheaper option if you’re on a tight budget, but they do rot if not well maintained and may eventually start to lean or even be blown over in heavy winds. By contrast, concrete posts are more likely to last in the long term, especially against strong gusts of wind. They need less maintenance than wooden posts .Concrete posts incur a higher up-front cost than timber posts, but their longevity makes them a better investment. You’ll still need to change the fence panels from time to time, but concrete posts won’t need to be replaced as often.Galvanised steel posts (we install a great system called Durapost) are lighter and stronger than concrete, but twice as quick to install. They don’t warp, crack or rot, and they can withstand winds up to 110mph. They’re compatible with almost any type of fence.